Why this matters for your vehicle
Your vehicle has two main air filters, and they each do very different jobs. One is for your engine, and the other is for you, the driver, and your passengers. Keeping both of these filters clean is essential for the health of your vehicle and your lungs. A clogged engine air filter can choke your engine, leading to poor performance and reduced fuel economy. Meanwhile, a dirty cabin air filter can turn your car's interior into a sneeze-fest, pumping in allergens and stale odors.
Think of it this way: your engine needs to breathe clean air to run efficiently, just like you do. If its air intake is restricted by a dirty filter, it's like trying to run a marathon while holding your breath. Similarly, if your cabin air filter is packed with leaves and dust, every time you turn on the AC or heat, you're circulating all that crud right into your face.
Regularly checking and replacing these filters is a basic maintenance task. It's often overlooked, but it makes a noticeable difference in how your car runs and how comfortable you are inside it.
Before you start: when NOT to DIY
While changing both air filters is usually a simple task, there are a few situations where you might want to consider taking it to a professional. If you encounter any of these, it's probably best to let a shop handle it:
- Your vehicle's owner's manual specifically states specialized tools or procedures are required.
- You find excessive corrosion or damage around the filter housings.
- The filter housing fasteners are stripped or seized, requiring drilling or extraction.
- You're uncomfortable working in tight spaces or with delicate plastic clips.
- Your vehicle's check engine light is on and you suspect the air filter is part of a larger issue.
Step-by-step procedure
Step 1 — Locate the engine air filter Pop your hood. The engine air filter housing is usually a large black plastic box, often on top of or to the side of the engine. It will have a large hose running from it to the engine's throttle body. Some vehicles have a round housing, others are rectangular. Familiarize yourself with its location and how it's secured.
Step 2 — Open the engine air filter housing Most engine air filter housings are held together with clips, screws, or a combination of both. Unlatch the metal clips or unscrew the fasteners holding the top of the housing down. You might need a screwdriver for this. Once loose, lift the cover to expose the old filter. Be gentle with any plastic components, as they can become brittle over time.
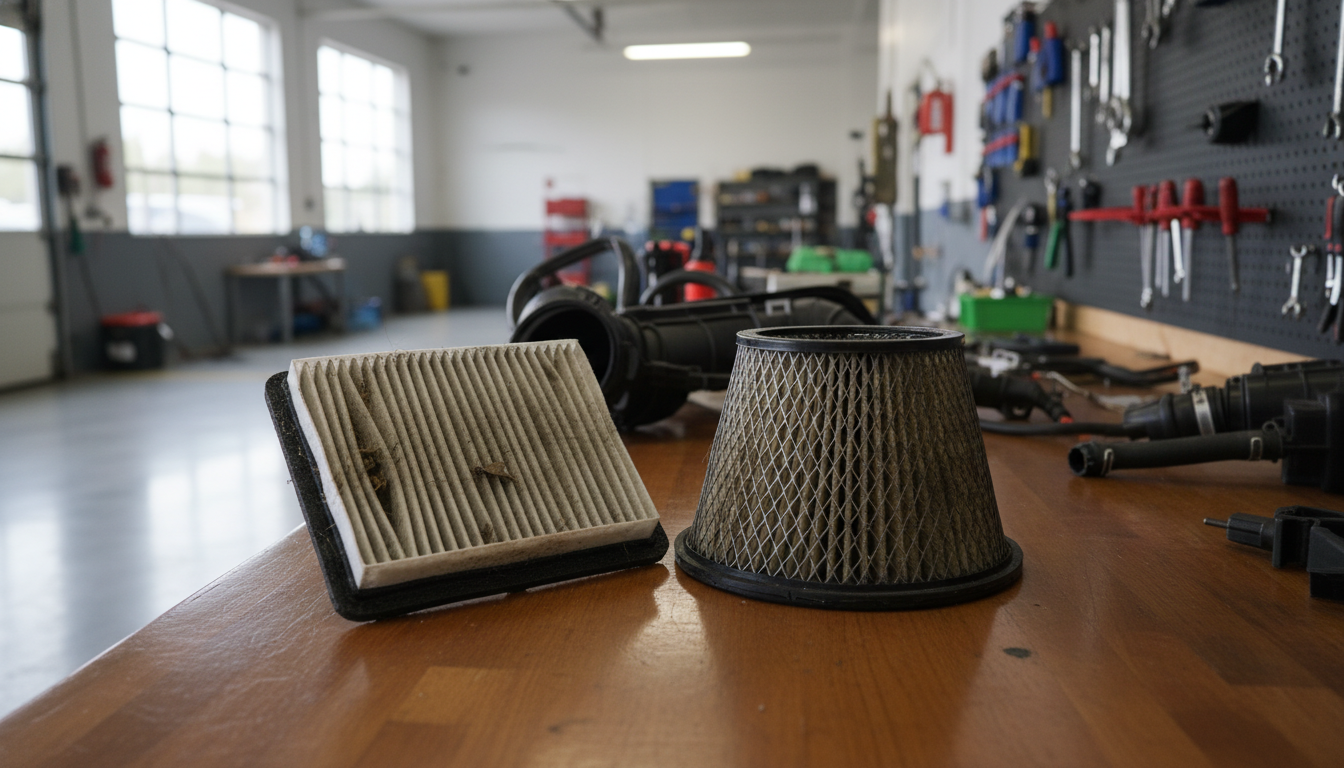
Step 3 — Remove and inspect the old engine air filter Carefully pull the old filter straight out. Take a good look at it. Is it full of leaves, bugs, dust, or even small rocks? A clean filter is typically white or light yellow. A dirty one will be dark gray or black. Compare it to your new filter. I always make sure the new filter matches the old one perfectly in size and shape before installing. This avoids having to put the old, dirty filter back in while I go get the right part.
Step 4 — Clean the engine air filter housing Before dropping in the new filter, use a shop vac or a clean rag to remove any debris from inside the air filter housing. You don't want any dirt falling into the engine's air intake. Make sure the sealing surfaces are clean and free of obstructions.
Step 5 — Install the new engine air filter Place the new engine air filter into the housing, ensuring it sits flush and creates a good seal all around. The rubber gasket on the filter should be seated correctly. Then, reattach the cover, making sure all clips are latched and any screws are tightened to factory specification. Don't overtighten plastic screws, just snug them up.
Step 6 — Locate the cabin air filter The cabin air filter is usually behind the glove box, under the dashboard on the passenger side, or sometimes under the hood near the cowl. For most vehicles, you'll need to open the glove box. You might need to unclip the dampener arm on the side of the glove box and press in on the sides to let it swing down further, exposing the filter housing. Consult your owner's manual if you can't find it.
Step 7 — Open the cabin air filter housing Once you've located the housing, it's typically secured by two or more clips or a small plastic door. Release these clips or open the door. The filter might have a small pull tab or handle to help you slide it out. Be aware of the airflow direction arrow on the old filter before you remove it.
Step 8 — Remove and inspect the old cabin air filter Carefully slide the old cabin air filter out. Again, check its condition. You'll often find leaves, pet hair, dust, and sometimes even small rodent nests in really neglected filters. Note the direction of the airflow arrow on the old filter – this is crucial for correct installation of the new one. Most filters have an arrow pointing down, indicating airflow into the cabin.
Step 9 — Clean the cabin air filter housing Just like with the engine air filter, take a moment to clean out any debris inside the cabin air filter housing. A small vacuum or a damp cloth works well. You want a clean environment for your new filter to do its job.
Step 10 — Install the new cabin air filter Slide the new cabin air filter into the housing, making sure the airflow arrow points in the correct direction (usually down, towards the cabin). Ensure it's fully seated and the housing door or clips are securely closed. Close up your glove box, and you're all set.
Bedding-in the new pads
There's no special bedding-in procedure for new air filters. Once they're installed, you're good to go. You might notice an immediate improvement in engine responsiveness or the freshness of your cabin air, especially if the old filters were very dirty.
How often to replace front brake pads
Engine air filters typically need replacement every 15,000 to 30,000 miles, or about once a year, depending on your driving conditions. If you drive frequently on dusty roads, you'll need to change it more often. Cabin air filters usually have a similar service interval, around 12,000 to 15,000 miles, or once a year. Pay attention to signs like reduced airflow from your vents, persistent stale odors, or increased dust inside the cabin – these are all indicators it's time for a new cabin filter. For the engine, a noticeable drop in fuel economy or sluggish acceleration can point to a clogged filter.
Top picks
Frequently asked questions
What's the main difference between a cabin air filter and an engine air filter?
The engine air filter protects your engine by filtering incoming air for combustion, preventing dirt and debris from causing damage. The cabin air filter cleans the air you breathe inside the car, removing pollen, dust, and pollutants from the HVAC system.
Can a dirty cabin air filter affect my car's performance?
No, a dirty cabin air filter will not affect your car's engine performance. Its only job is to filter the air entering the passenger compartment. However, it can significantly reduce airflow from your vents and introduce unpleasant odors into the cabin.
How can I tell if my engine air filter needs replacing?
You can usually tell by visual inspection. A clean filter is white or light yellow; a dirty one will be dark gray or black and may contain visible debris. Reduced fuel economy or sluggish acceleration can also be signs of a clogged engine air filter.
Are all air filters the same size and shape?
No, air filters vary significantly in size and shape depending on the vehicle's make, model, and year. Always consult your owner's manual or a parts catalog to ensure you purchase the correct filter for your specific vehicle.