Why this matters for your
Your vehicle's tires and wheels aren't perfectly uniform. Even brand-new components have slight variations in weight distribution. When you put them together and spin them up to highway speeds, these tiny imbalances can create a noticeable wobble or vibration. That's where wheel weights come in. They're small, calibrated pieces of metal added to the rim to counteract these heavy spots, ensuring the entire assembly spins smoothly.
Ignoring proper wheel balance isn't just about a shaky steering wheel. An unbalanced tire can lead to premature and uneven tire wear, putting stress on your suspension components, wheel bearings, and even steering linkage. Over time, this can shorten the life of expensive parts and make your ride uncomfortable and less safe. Getting your tires balanced correctly with the right type of wheel weights is a fundamental part of tire maintenance.
Before you start: when NOT to DIY
While understanding wheel weights is important, balancing a wheel yourself isn't a typical DIY job. It requires specialized equipment and expertise. If you're experiencing severe vibrations, don't try to add weights yourself. Take it to a professional shop if:
- You don't have access to a professional wheel balancing machine.
- You suspect a bent rim or internal tire damage.
- Vibrations persist after a professional balance.
- You're dealing with a sudden, severe vibration at any speed.
- You've hit a major pothole or curb and now have new symptoms.
Step-by-step procedure
Step 1 — Understand wheel imbalance Every tire and wheel assembly has a heavy spot. When you mount a tire, the goal is to align the tire's light spot with the wheel's heavy spot to minimize the overall imbalance. A balancing machine then measures the remaining imbalance and tells you exactly how much weight to add and where to put it. This ensures the wheel spins true, preventing vibrations and uneven tire wear.
Step 2 — Identify your wheel type Before you can choose a weight, you need to know what kind of wheel you have. Steel wheels typically have a distinct lip or flange around the edge, while alloy wheels often have a smoother, more finished look. The type of wheel dictates whether you'll use clip-on or stick-on weights.
Step 3 — Clean the wheel surface If you're replacing old weights or adding new ones, the wheel surface needs to be clean. For stick-on weights, this is absolutely critical. Use a degreaser or isopropyl alcohol to remove any dirt, grease, or old adhesive residue from the area where the weight will be applied. A clean surface ensures proper adhesion and prevents the weight from flying off at speed.
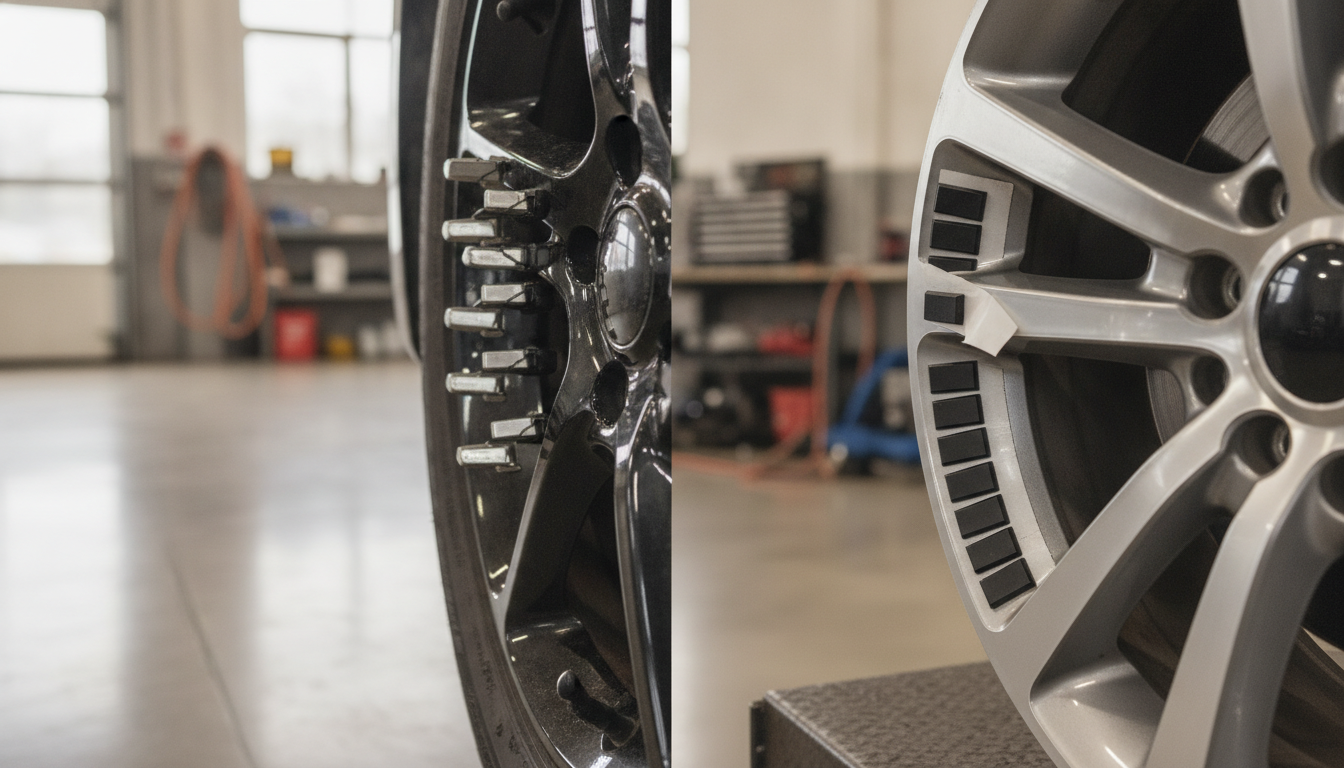
Step 4 — Select the correct weight type This is where the clip-on vs. stick-on debate comes into play. Clip-on weights are designed to hook onto the rim flange. They're usually made of lead, steel, or zinc and come in various sizes and profiles to fit different rim designs. Stick-on weights, also known as adhesive weights, have a strong adhesive backing and are applied to the inner barrel of the wheel. These are commonly used on alloy wheels where a clip-on weight might scratch the finish or not fit properly. I've seen countless alloy wheels come in with scratched finishes from clip-on weights installed by shops that didn't care enough to use the right type.
Step 5 — Position clip-on weights If using clip-on weights, the balancing machine will indicate the precise location. You'll use a specialized hammer to gently tap the weight onto the rim flange. Make sure it's seated securely and doesn't wiggle. The weight should be flush against the rim, with the clip fully engaged. Improperly seated weights can fall off.
Step 6 — Position stick-on weights For stick-on weights, once the wheel surface is clean and dry, carefully peel off the adhesive backing. Align the weight precisely with the location indicated by the balancing machine. Press it firmly onto the wheel's inner barrel, applying pressure for a few seconds to ensure a strong bond. Many stick-on weights come in strips that can be cut to the exact weight needed.
Step 7 — Re-check the balance After applying the weights, always run the wheel through the balancing machine again. This verifies that the added weights have corrected the imbalance. Sometimes, you might need to make small adjustments or add a second, smaller weight if the initial balance isn't perfect. This iterative process ensures the best possible balance.
Step 8 — Final inspection Once the wheel is balanced, do a quick visual inspection. Ensure all weights are securely attached. For clip-on weights, check that they're fully seated. For stick-on weights, confirm there are no loose edges. A properly balanced wheel will spin smoothly and quietly on the machine, indicating it's ready for the road.
Common mistakes
One common mistake is assuming that all wheels can use the same type of weight. Always check your wheel type before proceeding. Another mistake is neglecting to clean the wheel surface properly before applying stick-on weights. This can lead to poor adhesion and weights falling off. Lastly, failing to recheck the balance after adding weights can result in ongoing vibrations and uneven tire wear.
How often to replace front brake pads
This section is not applicable to wheel weights. Wheel weights are not a wear item in the same sense as brake pads. They should be replaced or adjusted whenever new tires are mounted, tires are rotated, or if you notice vibrations that indicate an imbalance. If a weight falls off, it needs to be replaced immediately.
Top picks
Frequently asked questions
Why do tires need to be balanced?
Tires and wheels aren't perfectly uniform in weight. Balancing corrects these imbalances by adding small weights, ensuring the assembly spins smoothly. This prevents vibrations, promotes even tire wear, and extends the life of suspension components.
What's the main difference between clip-on and stick-on weights?
Clip-on weights attach to the rim flange, commonly used on steel wheels. Stick-on weights have an adhesive backing and are applied to the inner barrel of the wheel, ideal for alloy wheels to avoid scratching the finish and for a cleaner look.
Can I balance my tires at home?
While basic bubble balancers exist, achieving a precise balance requires a professional dynamic wheel balancing machine. DIY balancing is generally not recommended for accurate results, especially for modern vehicles and higher speeds.
How often should I have my tires balanced?
You should have your tires balanced whenever you get new tires, rotate your tires, or if you notice any vibrations in the steering wheel or seat. Even if you don't notice issues, it's a good idea to check balance every 10,000 to 15,000 miles.